Practical Puppeteer Workflows for Next.js API Routes | Serverless Browser Automation

Web Coder
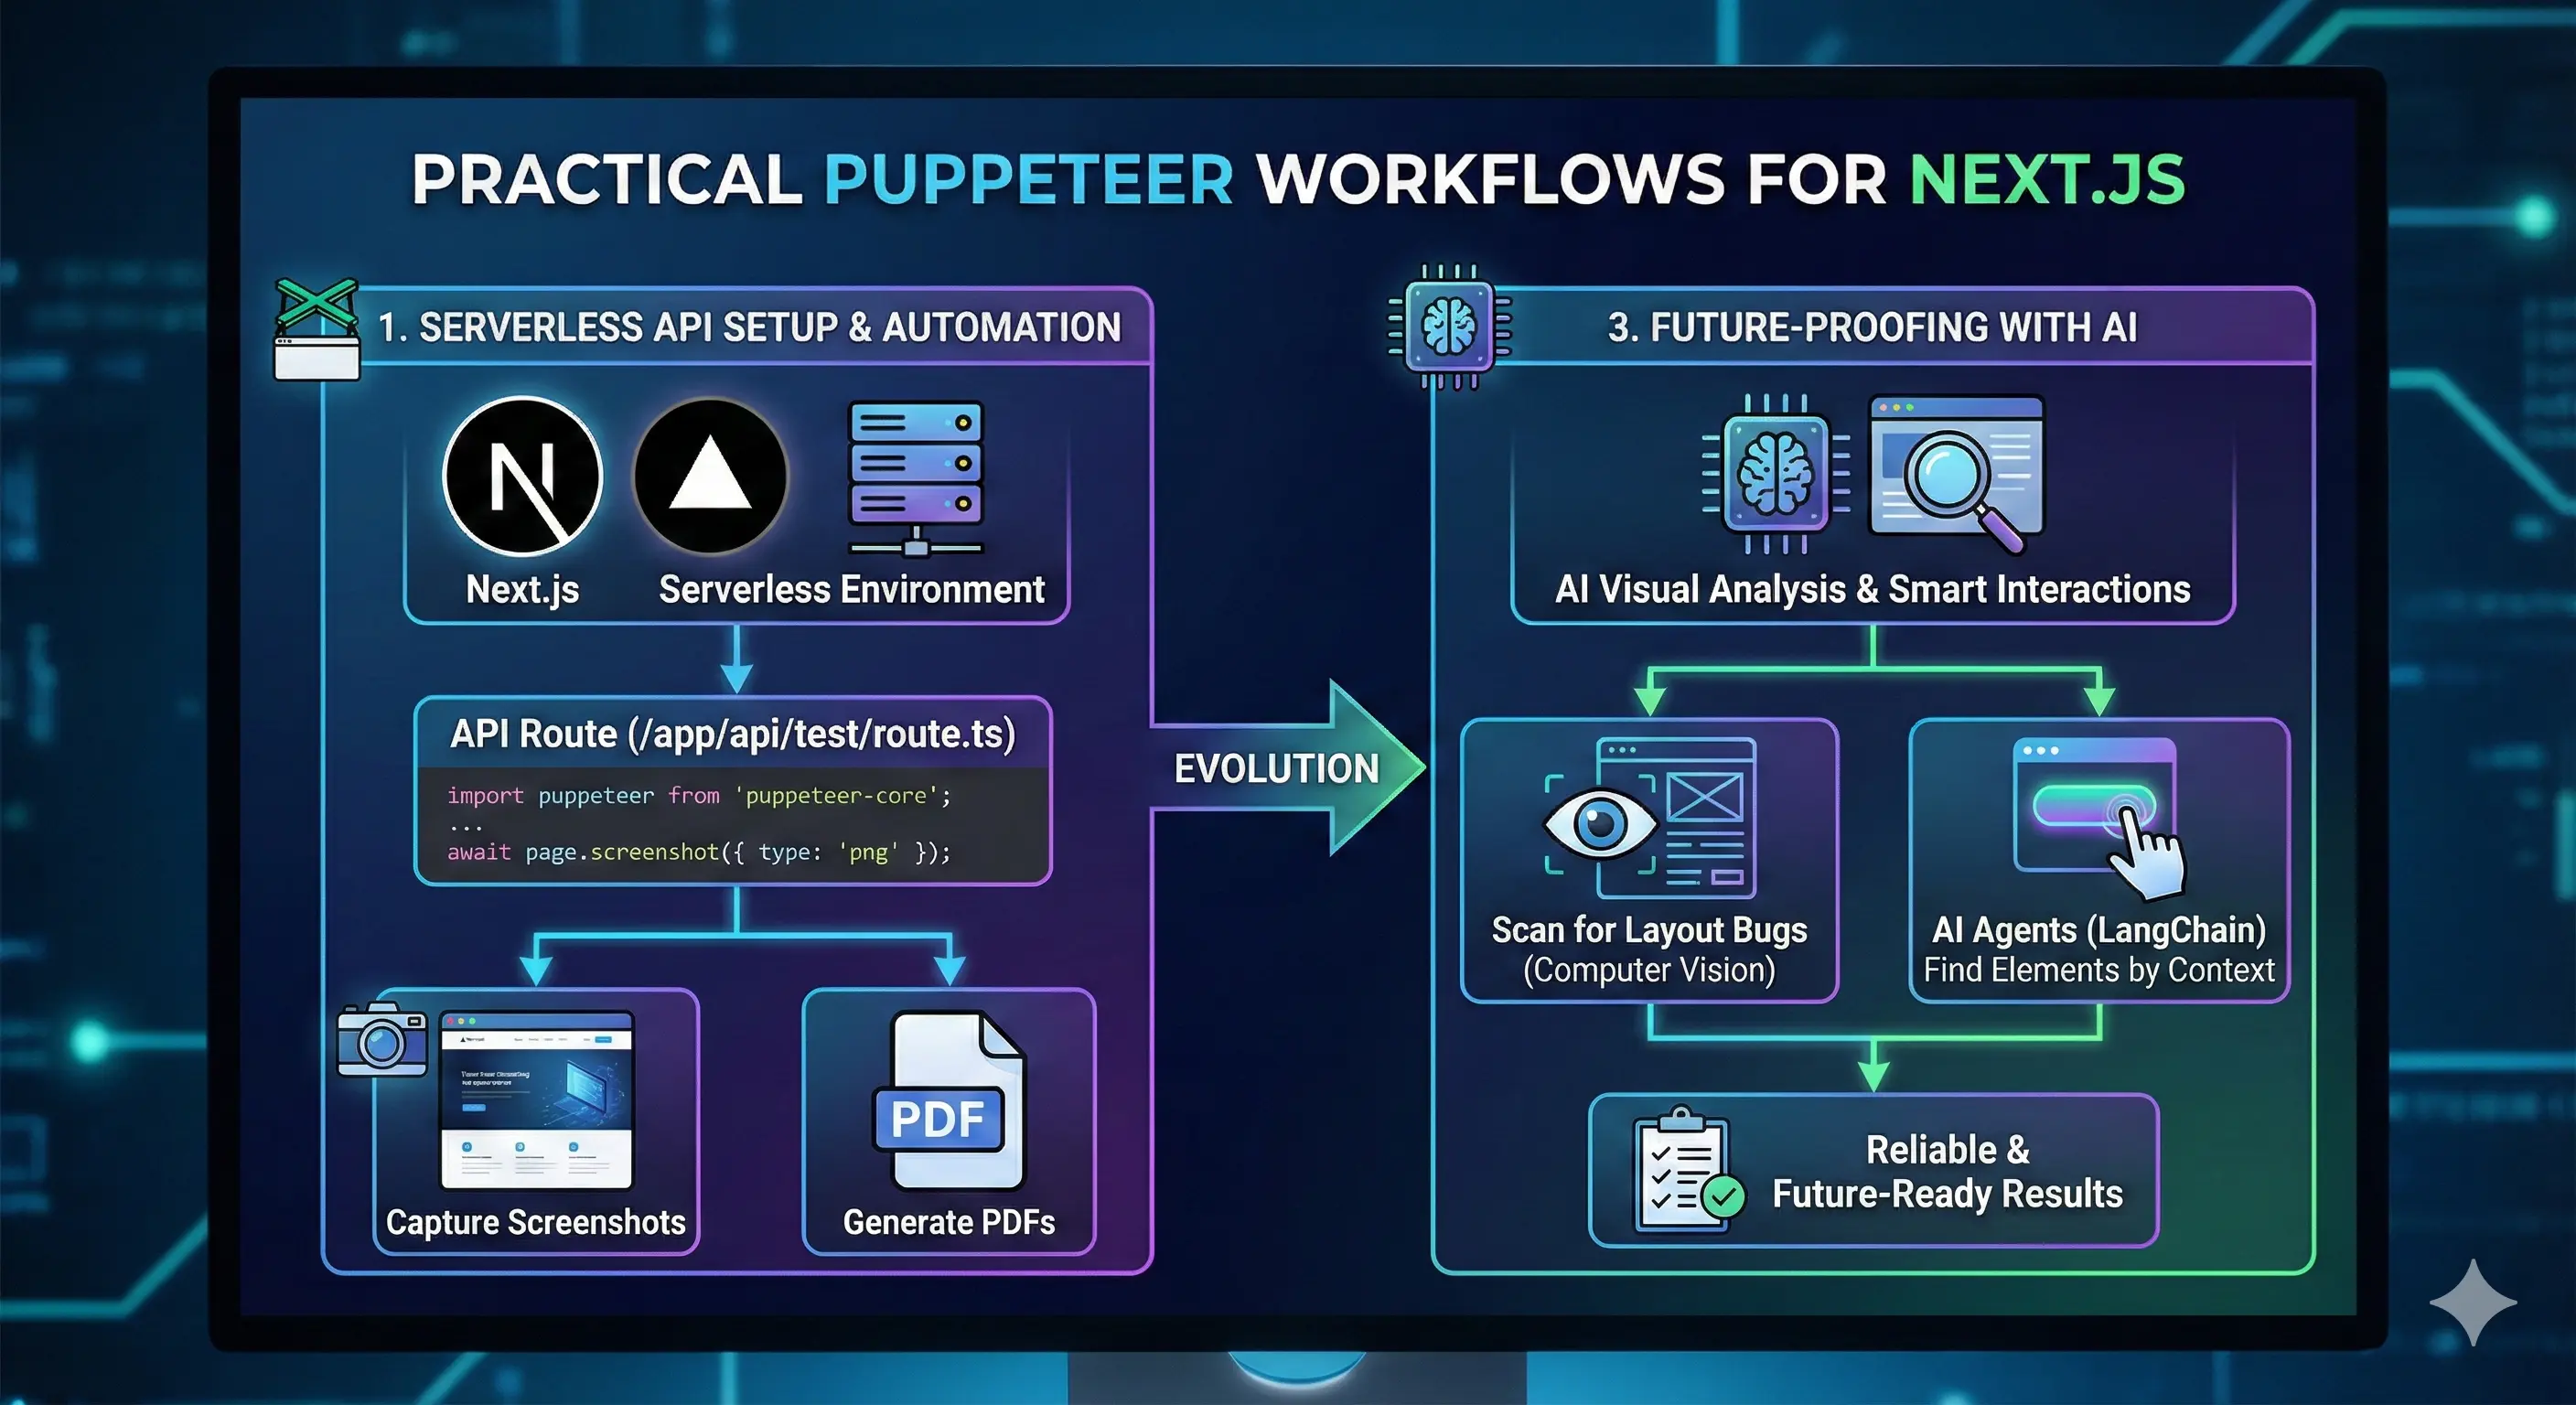
Overview: Automating Next.js with Puppeteer
Puppeteer with Next.js enables powerful, real-world browser automation directly inside API routes, making it ideal for serverless environments such as Vercel.
This approach is commonly used for:
- Screenshot and PDF generation
- Server-Side Rendering (SSR) validation
- Legacy JavaScript testing during migrations
- Visual regression and layout audits
- SEO rendering verification for dynamic pages
Because Puppeteer runs a real headless browser, it produces results that closely reflect actual user behavior, which is critical when debugging modern SSR applications.
Why Use Puppeteer with Next.js API Routes?
Next.js API routes act as secure, on-demand automation endpoints. When combined with Puppeteer, they allow you to:
- Run browser automation without a dedicated server
- Scale automatically with traffic
- Perform deterministic tests in CI/CD pipelines
- Keep automation logic close to your frontend codebase
For serverless deployments, this setup offers the best balance between accuracy, performance, and maintainability.
1. Running Puppeteer in a Serverless Next.js Environment
Standard Puppeteer includes a full Chromium binary, which exceeds most serverless size limits. To make Puppeteer serverless-friendly, use:
- puppeteer-core (no bundled browser)
- @sparticuz/chromium (lightweight Chromium for serverless platforms)
Installation
npm install puppeteer-core @sparticuz/chromium
This combination is optimized for platforms like Vercel, ensuring fast cold starts and reliable execution.
2. Creating a Puppeteer API Route in Next.js
The example below uses the Next.js App Router and demonstrates how to capture a screenshot using Puppeteer.
Example: Screenshot API Route
  import puppeteer from 'puppeteer-core';
  import chromium from '@sparticuz/chromium';
  import { NextResponse } from 'next/server';
  // Using GET allows easy testing via the browser address bar
  export async function GET() {
  try {
  // 1. Launch Chromium
    const browser \= await puppeteer.launch({
      args: chromium.args,
      defaultViewport: chromium.defaultViewport,
      executablePath: await chromium.executablePath(),
      headless: chromium.headless,
    });
  // 2. Open a new page
  const page \= await browser.newPage();
  // 3. Navigate to a target URL
    await page.goto('https://www.google.com', {
    waitUntil: 'networkidle2',
    });
    // 4. Capture screenshot
    const screenshot \= await page.screenshot({ type: 'png' });
    // 5. Close browser to free memory
    await browser.close();
    // 6. Return image response
    return new NextResponse(screenshot, {
    headers: { 'Content-Type': 'image/png' },
    });
  } catch (error) {
  return NextResponse.json(
  { error: 'Failed to take screenshot' },
  { status: 500 }
  );
  }
  }
Best Practices
- Always close the browser to avoid memory leaks
- Use networkidle waits to ensure content is fully loaded
- Keep API routes lightweight for faster execution
3. Common Use Cases in Production
Using Puppeteer with Next.js API routes unlocks multiple production-ready workflows.
Legacy JavaScript Validation During Next.js Migrations
When migrating older applications to Next.js, legacy JavaScript often breaks under SSR.
Puppeteer helps by:
- Executing scripts exactly as a real browser would
- Detecting runtime errors after hydration
- Verifying DOM mutations and event handlers
This ensures a smooth migration without hidden regressions.
SSR Correctness Checks for Third-Party Scripts
Third-party scripts such as analytics, personalization tools, and A/B testing platforms can fail in SSR environments.
With Puppeteer, you can:
- Verify script execution post-hydration
- Confirm dynamic content injection
- Detect client-only script issues early This prevents data loss and broken integrations.
Automated Visual Regression Testing
Visual bugs are often missed by unit and integration tests. Puppeteer enables visual regression testing by comparing screenshots across builds.
Common checks include:
- Layout shifts (CLS issues)
- CSS regressions
- Responsive UI breakages
This is especially useful when rolling out design changes.
SEO Rendering Audits for Dynamic Pages
Search engines index rendered HTML, not source code. Puppeteer allows you to inspect exactly what crawlers see.
Use it to:
- Validate meta tags and structured data
- Ensure content renders without JavaScript error
- Confirm SSR output is SEO-friendly
This makes Puppeteer a powerful tool for JavaScript SEO auditing.
Flexible Automation Using Query Parameters
You can make your API route dynamic by accepting query parameters such as:
- url – target page
- viewport – mobile or desktop
- device – real device emulation
This allows one API route to power multiple automation workflows and CI/CD tests.
4. Generating PDFs with Puppeteer
  Puppeteer is also ideal for generating **print-ready PDFs**.
  const page \= await browser.newPage();
  await page.goto(url, { waitUntil: 'networkidle0' });
  const pdf \= await page.pdf({
  format: 'A4',
  printBackground: true,
  margin: {
  top: '20px',
  right: '20px',
  bottom: '20px',
  left: '20px',},
  });
This is commonly used for invoices, reports, contracts, and static exports.
5. Future-Proofing with AI-Driven Automation
Puppeteer becomes even more powerful when combined with AI.
Visual Analysis
- Detect layout bugs using computer vision
- Identify CLS and spacing issues automatically
Smart Interactions
- Use AI agents to locate elements by visual context
- Reduce reliance on fragile CSS selectors
This makes automation more resilient as UIs evolve.
Conclusion
Puppeteer with Next.js API routes provides a robust, serverless-friendly approach to browser automation. It is ideal for SSR validation, SEO audits, legacy JavaScript testing, visual regression checks, and AI-driven automation.
By leveraging real browser rendering in a scalable environment, you can confidently ship Next.js applications that behave exactly as users—and search engines—expect.
Praveenkumar M
Web Coder
Praveenkumar M is a Web Coder at FUEiNT, contributing expert insights on technology, development, and digital strategy.